Discovering the Gaggia Classic: Your Ultimate Guide to Espresso Machines
If you’re venturing into the world of espresso, you’ve likely come across the Gaggia Classic. Renowned for its reliability and exceptional quality, the Gaggia Classic
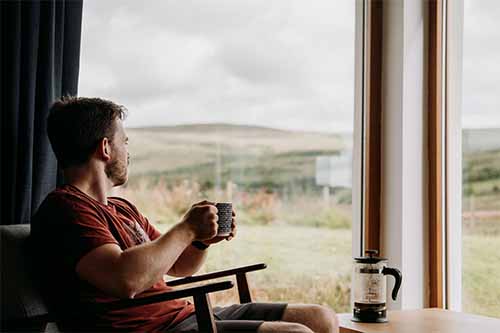
The Plunger, or French Press. One of the most common (and most delicious) ways of brewing and drinking coffee. The Plunger or French Press makes coffee by pressing a metal screen through coffee grinds & water, leaving you with just the extracted coffee to pour into your cup.
The difference between plunger coffee and other coffee brewing types (eg. Espresso Machine or Turkish Coffee) is that the coffee is not exposed to extreme levels of either pressure or temperature (boiling). This allows less chance for the coffee grinds to be stressed by too much extraction pressure or too much heat, and therefore less chance of there being lots of bitterness in your brew.
The variables are also much easier to control. You’re in complete control of how much coffee and water ratio you use, the temperature of the water, and the length of time it brews for. This allows for a repeatable process that will give you the perfect coffee for you, every time.
The humble plunger is known by many names around the globe. In North America it is referred to as a French Press or Coffee Press. In Britain and Ireland is it known as a cafetière. In New Zealand, Australia and South Africa, it is known as a coffee plunger. So in short, there is no difference between Plunger Coffee and French Press Coffee, apart from the name.
When grinding coffee for your plunger, you need to make sure that you have a coarse, even grind. Larger grinds of coffee have more surface area than smaller grinds, and will extract at a slower rate. If your grinds are uneven, then the smaller grinds will extract quickly and your larger ones slower. By the time your larger grounds have fully extracted, your smaller ones will have over extracted and burnt, and will give off a bitter taste.
Ensuring your grinds are also relatively coarse will make sure that they don’t pass through the mesh of the plunger, giving you a sort of coffee sludge in the bottom of your cup. Unless you’re a coffee grind reader, and can tell the future by what’s left in your cup when you’ve finished your coffee, you won’t like the sludge at the end.
Coffee burns at any temperature over 100 degrees, which means if you’re going to boil water with coffee in it, you’ll most likely end up with burnt coffee. There have been investigations conducted into the humble plunger, and whether pouring boiling water over coffee grinds tends to burn them and create bitterness in the cup. The investigations have shown that if you boil a kettle and then pour it into your plunger (on top of some coffee grinds), that by the time the water has come off the boil, and has been poured through the air, the temperature has decreased enough that it won’t burn the coffee. So don’t be afraid to pour yourself a plunger full of coffee with recently boiled water.
Here at Bean Merchant, our quiz will help you decide what coffee is best for you. If you’re purchasing coffee from a roaster and are looking for some types of beans that would be good, I’d always lean towards light or medium roasts. These types of roast tend to pack more flavour, which really comes into it’s own when brewed with pour-over coffee which is basically what a plunger is. You could try a nice single origin bean, but if I was buying a coffee blend I’d definitely want to make sure that the roaster had put it together specifically for pour-over and not espresso machines.
Here’s how to make the best French Press or Plunger coffee in the world.
Always measure your coffee out. Ratios for French Press or Plunger coffee can vary depending on how strong you like your coffee. They range from around 15g to 19g of water, per 1g of coffee. If you like it stronger, go to the lower end, if you like it weaker, head to the larger end. Have a play around with this each time you brew. If your coffee is bitter, you probably need to increase the ratio of water you’re using. If it tastes a bit salty, you need to decrease it.
Choose your coffee. Whether you’re grinding yourself or buying pre-ground, Bean Merchant can help with this part. Our quiz will match you with coffee perfect for your brewing style, and your taste profile, and deliver it to your door from a range of roasters all around NZ.
Now that you have chosen your coffee, grind it to a coarse grind profile. This will allow the water to extract the flavours of the beans, without burning them and making bitter compounds in your cup. If you’ve bought pre-ground you can safely skip this step.
Measure your coffee grinds out (according to your chosen ratio) and pour it into the plunger. I like to sit my plunger on my scales so I know exactly how much is going in. Follow your coffee grinds with your chosen amount of boiling water.
Stir your coffee vigorously with a spoon. Make sure all your grounds are saturated so that they’re all exuding the great coffee flavours.
Now we wait for 5 minutes. Let it brew…
After your 5 minutes, use two spoons and scrape as many of the floaties off the top as you can. This will help avoid the sludge in the bottom of your cup when you’ve finished drinking.
Wait another 4 minutes. I know this feels like a long time, but it will give the coffee time to extract fully. Try to avoid moving your plunger around during this time so that the coffee doesn’t get all stirred up again.
Now the fun part. Press your plunger down slowly until it rests on top of the liquid. We don’t push it all the way through because it stirs up all those grinds that we’ve just let settle.
Gently pick up the plunger and pour it through the plunger mesh into your cup.
Now you know how to make great plunger coffee. If you need help choosing your beans, check out our quiz. We will match you with coffee beans from NZ’s top roasters that suit your taste profile and are built for plunger brewing.
If you’re venturing into the world of espresso, you’ve likely come across the Gaggia Classic. Renowned for its reliability and exceptional quality, the Gaggia Classic
Nothing beats the sensation of that first sip. A new coffee flavour you’ve never tried before — and now it’s all yours. As the caramel
Coffee – it’s more than just a morning pick-me-up; it’s a journey of discovery. For many, the quest for the perfect cup begins with the

In 2020, something huge happened. The COVID19 pandemic and ensuing lockdowns created an opportunity for people to explore making coffee at home. Coffee machine sales

Nestled on the picturesque South Island of New Zealand, Christchurch is a vibrant city that boasts a thriving coffee culture. With its array of trendy

As coffee enthusiasts, we understand the significance of that first sip in the morning or the delightful mid-afternoon pick-me-up. At Bean Merchant, we pride ourselves
Copyright ©️ 2024 Bean Merchant. All Rights Reserved.
We do not hold financial information, all secure data is encrypted via Stripe.
Try our unique coffee flavour profiling quiz to find your perfect coffee beans.
Bean Merchant is New Zealand’s most relied upon curator for home coffee delivery. Whatever coffee flavours you are after, we have the widest variety to choose from.